Plan and install a wine fridge correctly
Smart preparation makes installing a wine fridge straightforward while protecting both the unit and your valuable collection. Start by measuring your available space, checking ventilation requirements, and gathering all necessary tools to ensure consistent temperatures and reliable operation. Learn the key installation steps to properly integrate clearance space, power supply, and surrounding cabinetry with your kitchen design.
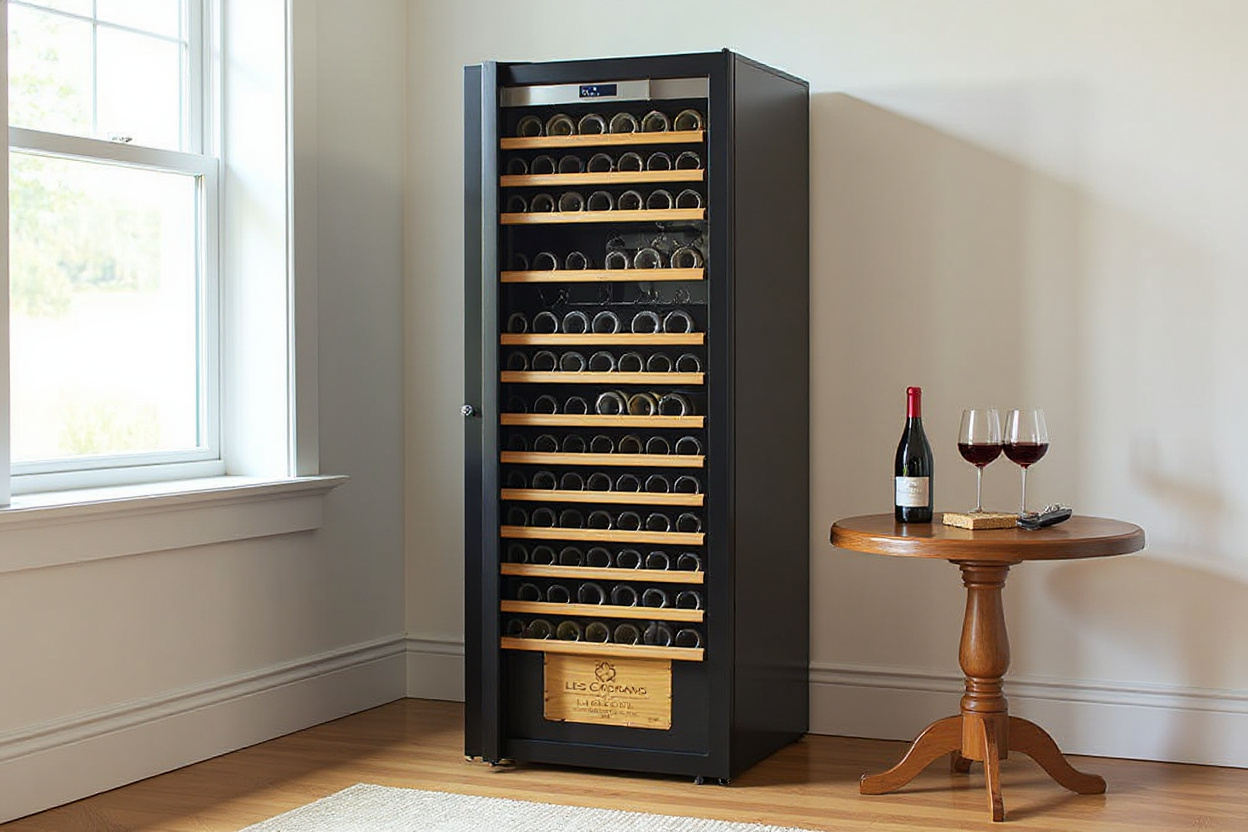
Where should a wine cooler go at home
The ideal location balances accessibility, temperature stability, and cabinetry considerations to preserve your wine perfectly. Avoid placing near ovens, dishwashers, heating vents, or direct sunlight, as these heat sources can cause overheating and strain the compressor. Allow 5-8 cm of clearance on sides/back and 25-30 cm above the unit for efficient air circulation.
- Climate class matching: Align room conditions with your cooler’s specified climate class to prevent compressor issues in warm or variable environments.
- Door clearance: Maintain about 5 cm in front for full door opening without obstruction.
- Built-in vs freestanding: Freestanding models need open space on all sides, while built-in wine coolers require exact cabinet measurements with proper venting.
Our units feature straightforward ventilation specifications to simplify placement decisions. Position near a grounded outlet (within 1 meter) to avoid unsafe extension cords. Following these guidelines from the start protects your investment and ensures perfect serving temperatures.
Power and leveling for built-in and freestanding install
Electrical safety and precise leveling form the foundation of effective wine fridge installation. Connect directly to a dedicated grounded outlet (120V or 220-240V), bypassing power strips that may overheat. For shared circuits, keep total load below 80% of the breaker’s capacity.
Use a spirit level to adjust the unit’s feet or anti-vibration pads until perfectly balanced. Proper leveling stabilizes door operation, minimizes noise, and ensures proper drainage. Built-in models require verification of ventilation clearance before securing mounting brackets, while freestanding units on uneven floors may need shims. After moving, let the appliance rest upright and unplugged for 2+ hours to allow refrigerant stabilization before use.
Small wine fridge install made simple
Compact countertop wine coolers offer effortless setup for limited spaces like apartments or home bars. These units typically hold 2-12 bottles and simply need a grounded outlet with minimal side/back ventilation space. Installation involves unpacking, removing shipping materials, placing on a stable surface away from heat, and plugging directly into an outlet.
Ensure your counter or shelf is level and sturdy enough to support the loaded weight (usually 5-15 kg). Maintain 2-3 cm of rear clearance and adequate front space for door operation. Most countertop models use silent Peltier cooling, performing best between 15-30°C, so avoid placement near cooking surfaces or sunny windows.
Step-by-step wine cooler installation at home
Turning that boxed wine fridge into a fully functional climate-control system is easier than you think. Follow these simple installation steps to get your freestanding or built-in wine cooler up and running perfectly. Learn why a dedicated wine fridge outperforms regular refrigerators for proper storage, and how correct installation ensures ideal temperature zones, proper humidity, and minimal vibration.
Exact steps to install a built-in wine fridge
Start by carefully removing your built-in wine fridge from its packaging in your kitchen. Check for any shipping damage and remove all transit bolts. Measure your cabinetry space carefully – you’ll need at least 2 cm of space on all sides for proper ventilation clearance during installation. Gently slide the unit into place, making sure the door opens smoothly and that all vents align correctly with your cabinet openings.
Use the adjustable feet to level your wine cooler perfectly from front to back and side to side. Secure it firmly with the included mounting brackets to prevent any shifting. Fill small gaps between the cooler and cabinetry with heat-resistant silicone for better efficiency and to keep kitchen heat out. Plug the cord into a grounded outlet within one meter, and if your unit was transported on its side, let it sit upright for 2-4 hours before turning it on to allow the refrigerant to settle.
Initial power-on and temperature setup
After waiting, plug in your wine fridge and power it on. Set your preferred temperature zones – typically 6–8°C for sparkling wines in the upper section and 10–18°C below for whites or reds. Let the unit run with the door closed for at least 30 minutes to stabilize before adding any bottles.
Listen for smooth compressor operation – any rattling may mean your floor isn’t level. Verify temperatures with a separate thermometer. Test the door seal by closing it on a piece of paper; if it slides out easily, adjust the leveling. When everything’s stable, load bottles horizontally, leaving about 1 cm space between them and never filling more than 80% to maintain airflow.
Don’t forget to fill the humidifier (as mentioned in your manual) to maintain 50–80% humidity for healthy corks. Our innovative preservation features like Bubbl. for sparkling wines and inert-gas systems help keep opened bottles at perfect serving temperature without flavor loss.
When to hire professional installation
For complex jobs requiring cabinet modifications, electrical work, or major leveling, professional installation is recommended. Certified experts ensure precise measurements, proper mounting, adequate ventilation, and thorough testing for optimal performance. Professional service often maintains your warranty and eliminates electrical hazards if you’re unfamiliar with plug and cord requirements.
Our installation team handles everything – from unpacking to final testing for both built-in and freestanding wine coolers. Important note: We only connect to existing grounded outlets within one meter and don’t perform cabinet modifications or electrical work – arrange these separately beforehand. Contact us early for special requests like door reversal, old appliance removal, or extra ventilation needs – availability varies by area.
Costs and installation in existing cabinets
Before adding a wine fridge to your current cabinetry, it’s smart to consider both budget and space needs. This prevents unexpected expenses and layout issues. We’ll break down average wine fridge installation costs, share safe retrofitting techniques, and offer tips to maximize your climate-controlled unit’s performance. Whether you’re placing it in your bustling kitchen or a cozy pantry corner, knowing cost factors and ventilation requirements ensures a smooth process and perfectly chilled wine.
How much does wine fridge installation cost?
The price of wine cooler installation varies widely depending on whether you do it yourself or hire professionals, and whether you choose freestanding or built-in models. A simple DIY setup on your floor might only need basic tools and cost under $20, while professional built-in wine cooler installation can exceed $500 when you factor in carpentry, electrical work, and service fees.
- Freestanding setup: Minimal cost if you have a level surface and nearby outlet – just add shims if needed.
- Built-in installation: Higher price covers cabinet modifications, vent work, and secure mounting.
- Electrical updates: Adding a dedicated circuit or GFCI outlet typically costs $50-$200 for an electrician.
- Warranty protection: Many manufacturers require professional installation to maintain coverage.
After initial wine fridge installation, plan for maintenance like coil cleaning and filter changes. Also budget for potential issues like uneven floors or unusual cabinet dimensions that might require adjustments.
| Installation type | Typical cost range | Key considerations |
| DIY freestanding | $0–$50 | Level floor, nearby outlet, basic tools |
| Professional freestanding | $100–$200 | Includes leveling, anchoring, functional test |
| DIY built-in | $50–$150 | Cabinet cutting, vent grille, mounting brackets |
| Professional built-in | $200–$500+ | Cabinet work, electrical, warranty compliance |
| Electrical upgrade | $50–$200 | Dedicated circuit or GFCI by licensed electrician |
Can you install in an existing cabinet?
Absolutely! You can place a wine cooler in existing cabinets as long as the model is designed for built-in use and has proper airflow. Start by carefully measuring your space, leaving at least 2cm clearance around the unit and ensuring adequate ventilation clearance. If the cabinet has solid sides, you’ll need to add ventilation grilles to prevent overheating.
Never position a built-in wine cooler flush against the wall unless it’s specifically designed for front-only ventilation. When doing an existing cabinet install, check that the shelf can support the weight when full and reinforce if necessary. Make sure to level the base before placing the unit and adjust shelves so the door opens completely without obstruction.
After positioning, attach side brackets evenly, seal small gaps with heat-resistant silicone, and confirm the plug reaches an appropriate outlet. Countertop models offer an easier alternative if cabinet modification seems challenging. Always double-check airflow paths and electrical connections before long-term use.
Serving tips and temperature rules
Proper serving temperatures enhance every wine’s character. A dual zone cooler makes this simple: serve reds at 15-18°C (chill for about 20 minutes if coming from room temperature), whites at 10-12°C (rest for 10 minutes after removing), and sparkling wines at 6-8°C (ideal for the coldest zone).
Store bottles sideways to keep corks moist, leaving small gaps between them for optimal ventilation. Avoid filling beyond 80% capacity – overcrowding reduces airflow efficiency and increases energy use. Our preservation systems work with any cooler installation, letting you enjoy multiple servings from one bottle without sacrificing quality.